
Smart Update allows you to test WordPress updates before they are applied to the live (production) website. This means that a potentially problematic update is first tested on a copy of the website rather than on the site currently being used by your visitors or customers.
- Log in to the Area IT customer portal to access your cPanel.
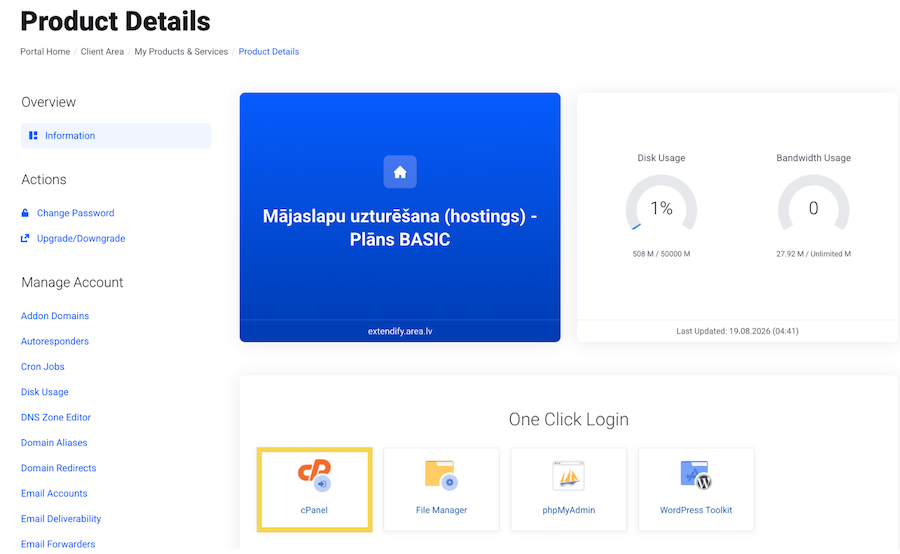
2. Go to WordPress Management.

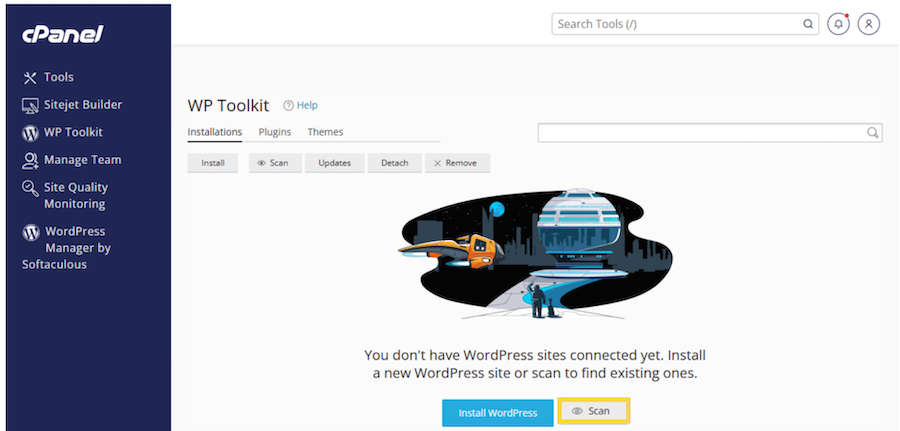
3. Find the WordPress website for which you want to configure updates. If you do not see the website, you need to use the Scan function.
4. Enable the Smart Update toggle.
This is not required for standard automatic updates, but it is recommended because Smart Update allows you to test the impact of updates on a copy of the website before applying the changes to the production site.
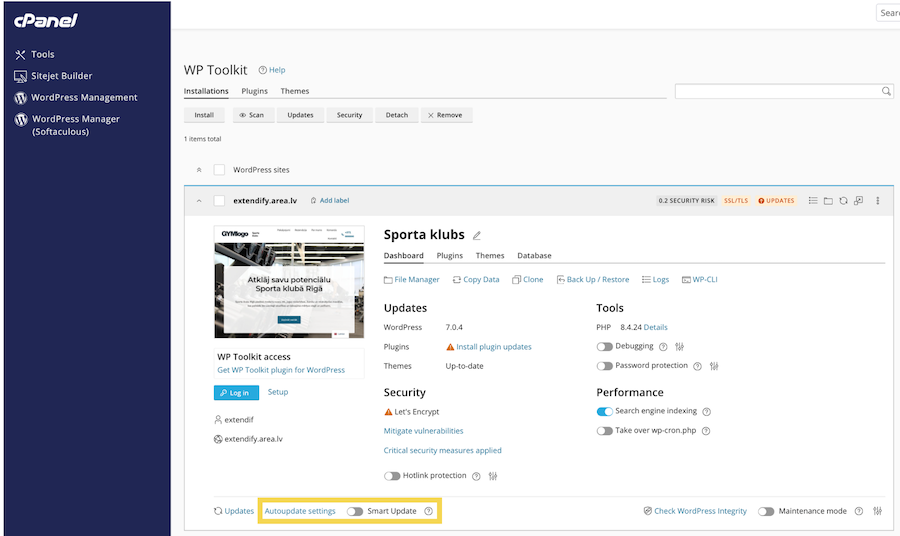
5. Open the automatic update settings by clicking Autoupdate settings.
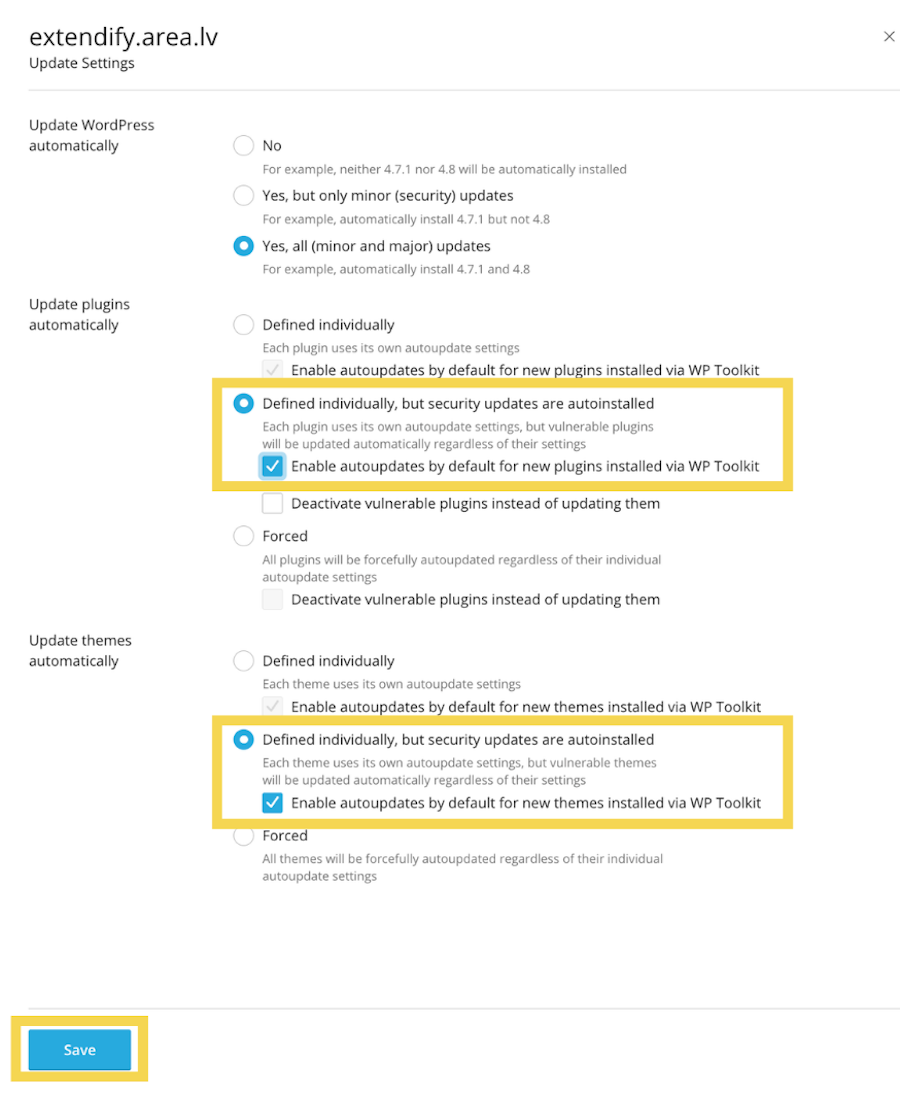
Recommended configuration:
• Under Update WordPress automatically, you can keep the existing setting: Yes, all (minor and major) updates;
• Under Update plugins automatically, select Defined individually, but security updates are autoinstalled;
• Under Update themes automatically, select at least Defined individually, but security updates are autoinstalled.
Save the settings by clicking Save.
This ensures that critical security updates are not unnecessarily delayed, while still allowing you to maintain greater control over major updates.


